How to Master the Art of Making Homemade Sourdough Starter

If you had told me five years ago, while I was knee-deep in finger paints and toddler tantrums in a preschool classroom, that I would spend my Friday nights obsessing over the fermentation levels of a jar of flour and water, I would have laughed. Back then, "fancy cooking" was something that happened to other people—people with more time and much more expensive kitchen gadgets.
But then life happened. The kids got older, my schedule got tighter, and my grocery bills started looking more like a mortgage payment. I realized that if I wanted to feed my family high-quality, gut-friendly bread without paying $9.00 a loaf at the artisanal bakery down the street, I needed to master the basics. Specifically, I needed to master the sourdough starter.
A sourdough starter might sound intimidating—like some high-maintenance science experiment—but it is actually one of the most budget-friendly skills you can learn. It is literally just flour and water. It is the ultimate "slow food" that actually helps you survive the busy week by allowing you to bake ahead. Once you have a thriving starter, you aren't just making bread; you are building a cornerstone for your family's kitchen. It’s a way to ensure that even when things get chaotic, you have a reliable, nutritious staple ready to go.
What Exactly is a Sourdough Starter?
At its simplest, a sourdough starter is a fermented mixture of flour and water that captures wild yeast and beneficial bacteria (lactobacilli) from the air and the flour itself. These microorganisms eat the sugars in the flour and produce carbon dioxide, which is what makes your bread rise, and organic acids, which give sourdough that signature tangy flavor.
Unlike commercial yeast, which is a single, highly concentrated strain, a starter is a living ecosystem. It is much more complex, which is why many people find it easier on their digestion. For families dealing with sensitivities, this natural fermentation process can make grains much more approachable. If you are interested in how dietary shifts can impact long-term wellness, you might find it helpful to read about science-backed pillars for a longer, healthier life, as gut health is a massive piece of that puzzle.
The Essential Toolkit
Before we dive into the process, let's get organized. As a mom, I’ve learned that if I don't have my tools ready before I start, I’ll lose steam halfway through. You don't need a professional kitchen, but you do need these basics:
- A Glass Jar: A wide-mouth mason jar or a large glass canning jar works best. Avoid plastic if possible, as the acidity of the starter can sometimes react with it over time.
- A Digital Kitchen Scale: I cannot stress this enough. Volume measurements (cups) are notoriously inaccurate for fermentation. A scale ensures consistency.
- Flour: Whole wheat or rye flour is excellent for starting because the hulls contain more of the wild yeast you need. You can use all-purpose flour once the starter is established, but for the beginning, go with something "unrefined."
- Filtered Water: Chlorine in tap water can sometimes inhibit yeast growth. If your tap water smells strongly of chlorine, let it sit out on the counter for an hour before using, or use filtered water.
- A Spatula: A small silicone spatula for stirring.
- A Breathable Cover: A piece of cloth or a loose-fitting lid.
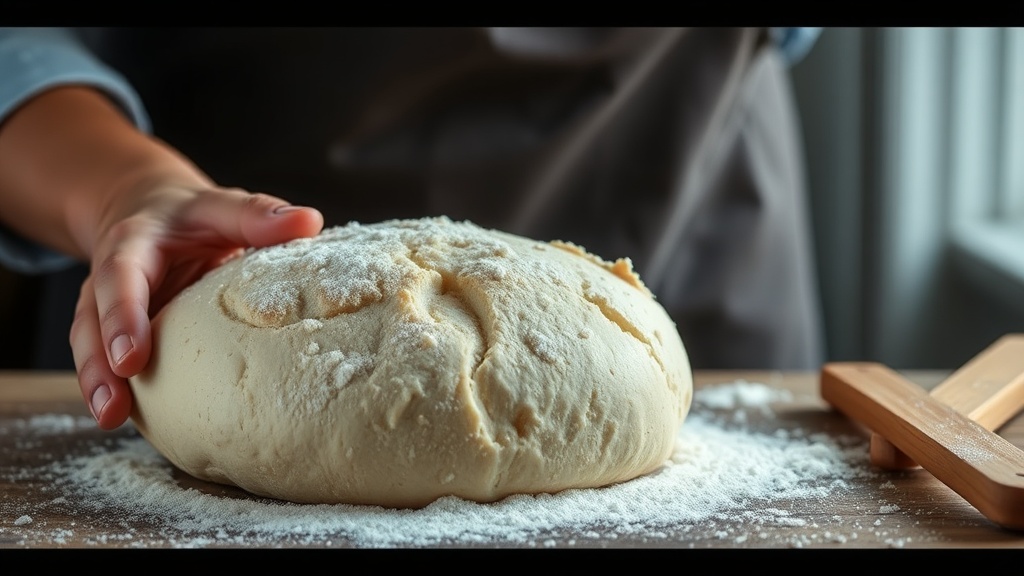
The 7-Day Step-by-Step Guide
This process usually takes about 7 to 10 days, depending on the temperature of your kitchen. If your house is cool, it might take a little longer. Think of this like teaching a toddler a new skill—it takes repetition and patience.
Day 1: The Beginning
In your clean glass jar, combine 50g of whole wheat flour and 50g of lukewarm filtered water. Stir vigorously until no dry flour remains. The mixture should look like a thick, shaggy paste. Cover the jar loosely (it needs to breathe!) and leave it in a warm spot in your kitchen.
Day 2: The First Check-In
You might see nothing happening today, and that is perfectly fine. Do not panic. Even if there are no bubbles, do not add more flour yet. Just stir the mixture once to aerate it, cover it, and let it sit. We are waiting for the microbes to wake up.
Day 3: The First Feeding
Now we begin the "feeding" cycle. To feed a starter, you discard a portion of the mixture and add fresh flour and water. This prevents the jar from overflowing and ensures the yeast has fresh food.
The Process: Discard half of the mixture in the jar (about 50g). Add 50g of flour (you can use a mix of whole wheat and all-purpose now) and 50g of water. Stir well. You might see a few tiny bubbles now.
Day 4, 5, and 6: Establishing Consistency
Repeat the Day 3 process every 24 hours: Discard half, then add 50g flour and 50g water. By Day 5, you should notice a distinct sour smell (not a "rotten" smell, but a tangy, fermented smell) and a more significant increase in bubbles. The mixture should also appear more voluminous after a feeding.
Day 7: Is It Ready?
Your starter is ready to bake with when it is "active." This means it should consistently double in size within 4 to 6 hours after a feeding. A great way to test this is the Float Test: Drop a small teaspoon of your active starter into a glass of water. If it floats, you have enough gas trapped inside to lift a loaf of bread. If it sinks, it needs more time or more frequent feedings.
"The secret to a successful starter isn't a magic ingredient; it's consistency and temperature. Treat your starter like a slow-growing garden rather than a quick recipe."
Troubleshooting Common Issues
As a former teacher, I know that things rarely go perfectly the first time. If your starter looks a little "off," don't throw it away! Here is what you might be seeing:
- Liquid on Top (Hooch): If you see a dark liquid sitting on top of your starter, don't freak out. This is called "hooch." It’s a sign that your starter is hungry. It has exhausted its food supply and is producing alcohol. Simply pour it off and perform your next feeding immediately.
- No Bubbles: This usually means your water is too cold or your flour is too processed. Try using more whole grain flour and ensure your water is lukewarm, not hot.
- A Bad Smell: A healthy starter should smell tangy, fruity, or even slightly vinegary. If it smells like gym socks or actual rot, it is likely contaminated. In that case, it's best to start over with a clean jar.
Maintaining Your Starter on a Budget
Once your starter is healthy, you don't have to feed it every single day. This is where the "survival" part of my philosophy comes in. If you aren't planning to bake during the week, you can keep your starter in the refrigerator. This slows down the fermentation process significantly. You only need to take it out and feed it once a week to keep it alive. This is a great way to save money and prevent food waste, especially if you are already managing a tight household budget. For more tips on managing household expenses and unexpected shifts, check out our post on understanding how economic shifts impact your daily life.
When you are ready to bake, take the starter out of the fridge a few hours early, feed it, and let it get bubbly and active on the counter before adding it to your dough recipe.
The Big Picture: Why This Matters
Mastering sourdough is about more than just bread. It is about reclaiming a bit of control over what goes into your body and how much you spend at the grocery store. It is about the satisfaction of seeing a tangible result from just two ingredients. Whether you are prepping for a busy week or looking for ways to make your pantry more resilient, a sourdough starter is a tool that serves you for years, not just a single loaf.
If you are looking to streamline your entire kitchen routine—from breakfast to dinner—don't forget to check out our Sunday Freezer Breakfast Reset. Between a well-stocked freezer and a homemade sourdough starter, you'll be well on your way to a more organized, budget-friendly, and delicious kitchen.
Steps
- 1
Day 1: The Initial Mix
- 2
Day 2: The First Feed
- 3
Day 3-7: Consistent Feeding Routine